
Tempaper Self Adhesive Wallpaper – Bathroom Reveal
Tempaper Project
 I’m so excited to reveal to you the finished project of Tempaper self adhesive wallpaper in my basement powder bathroom! Remember the little sneak peak I gave you a couple of weeks ago?
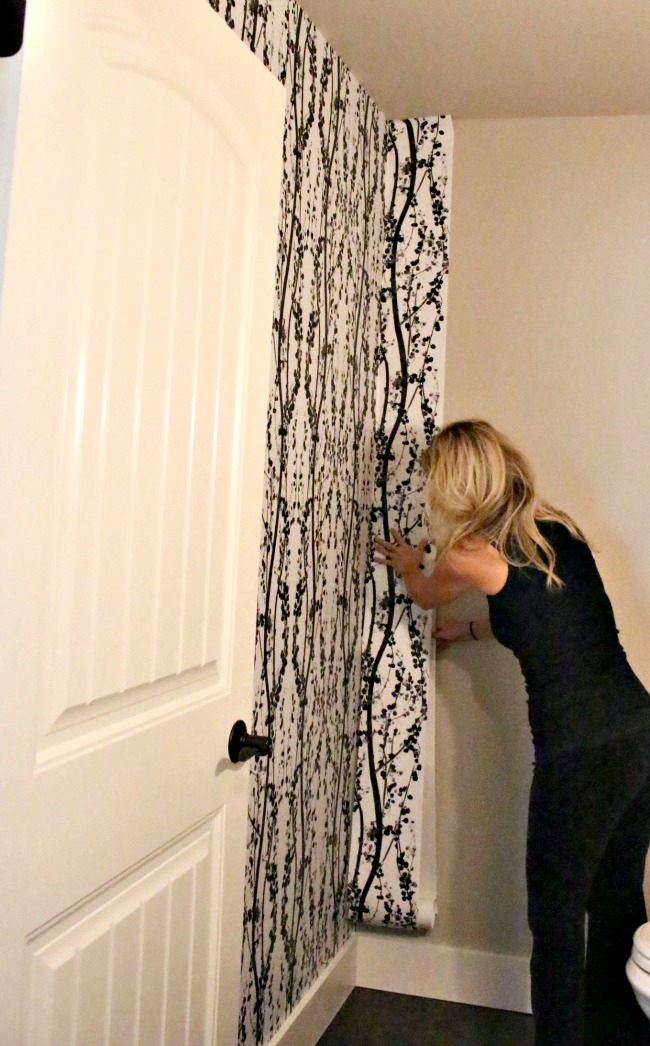
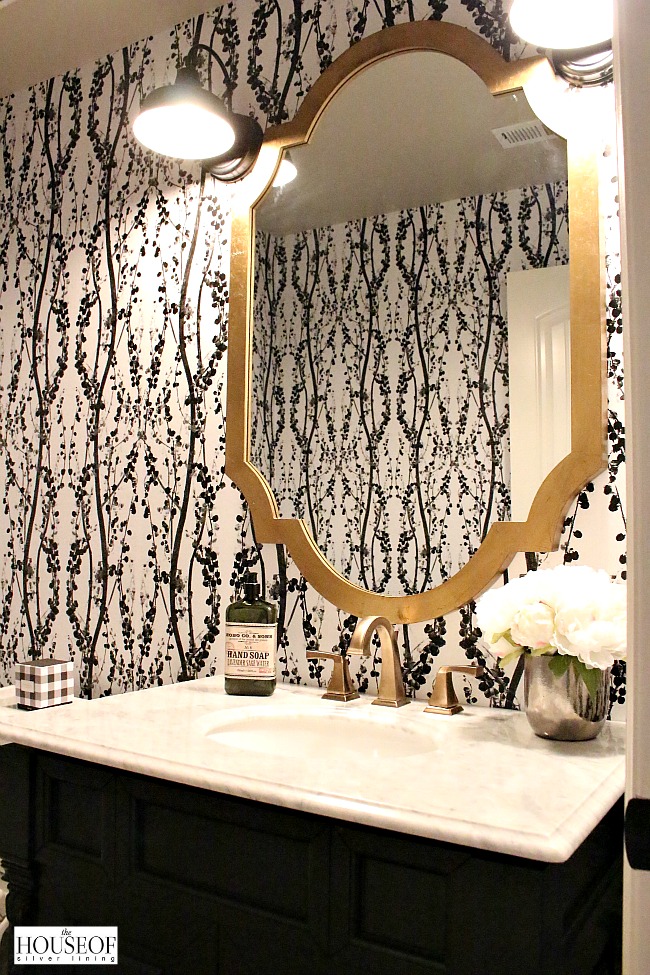
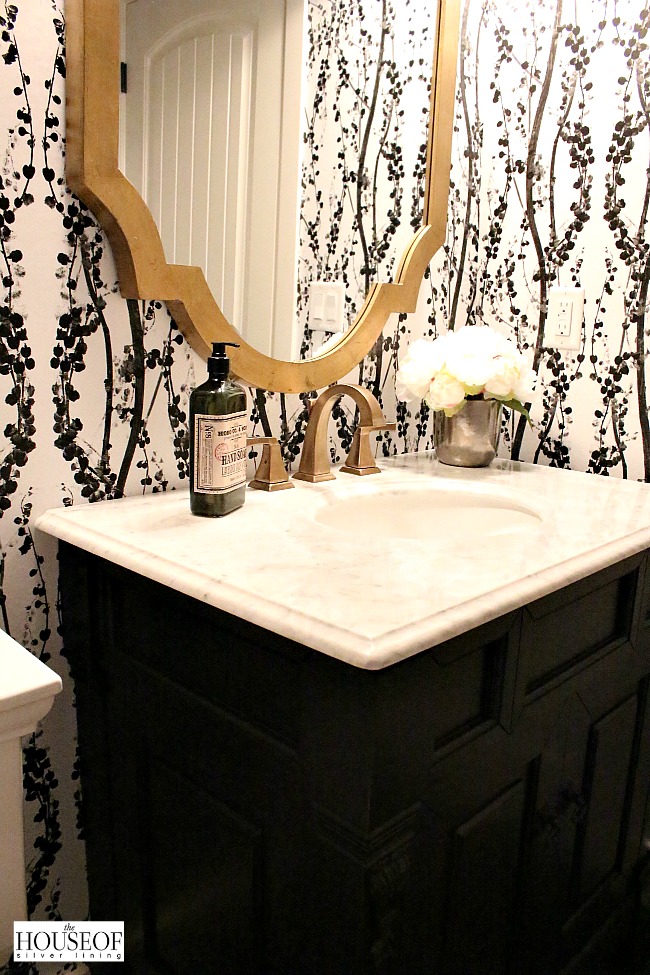
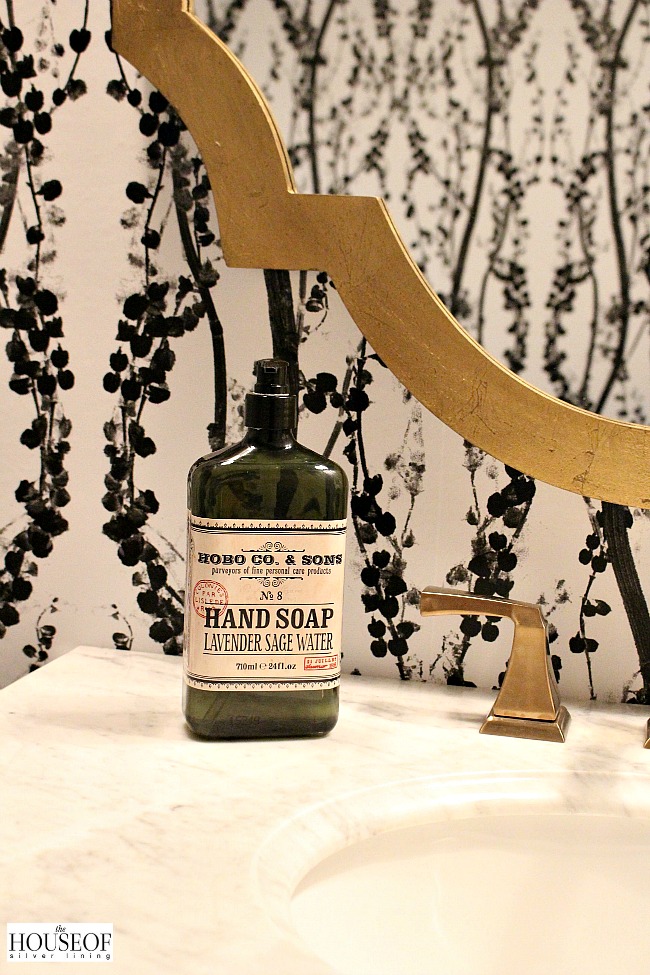
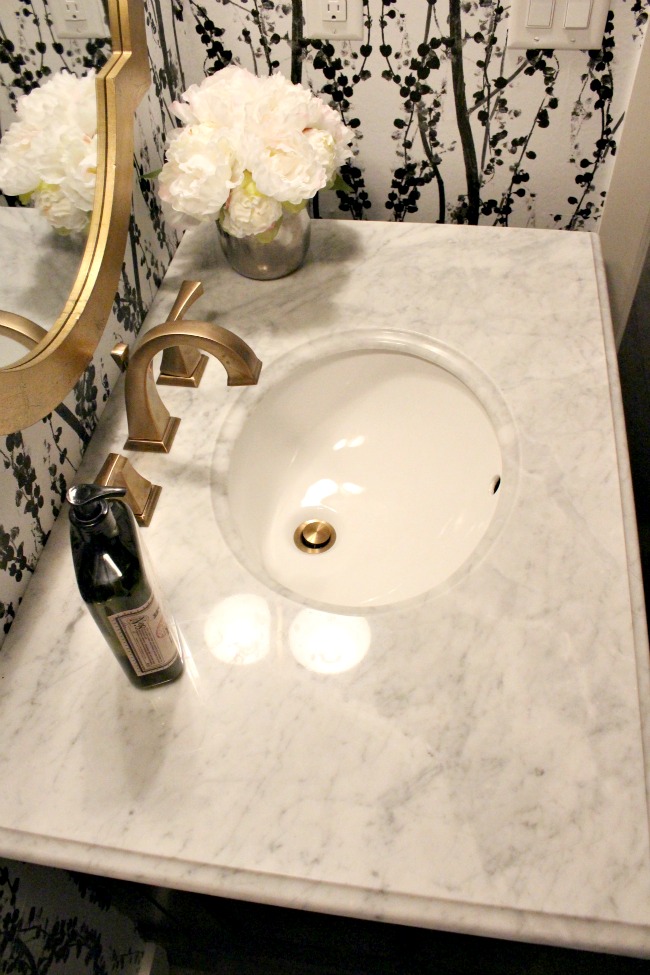
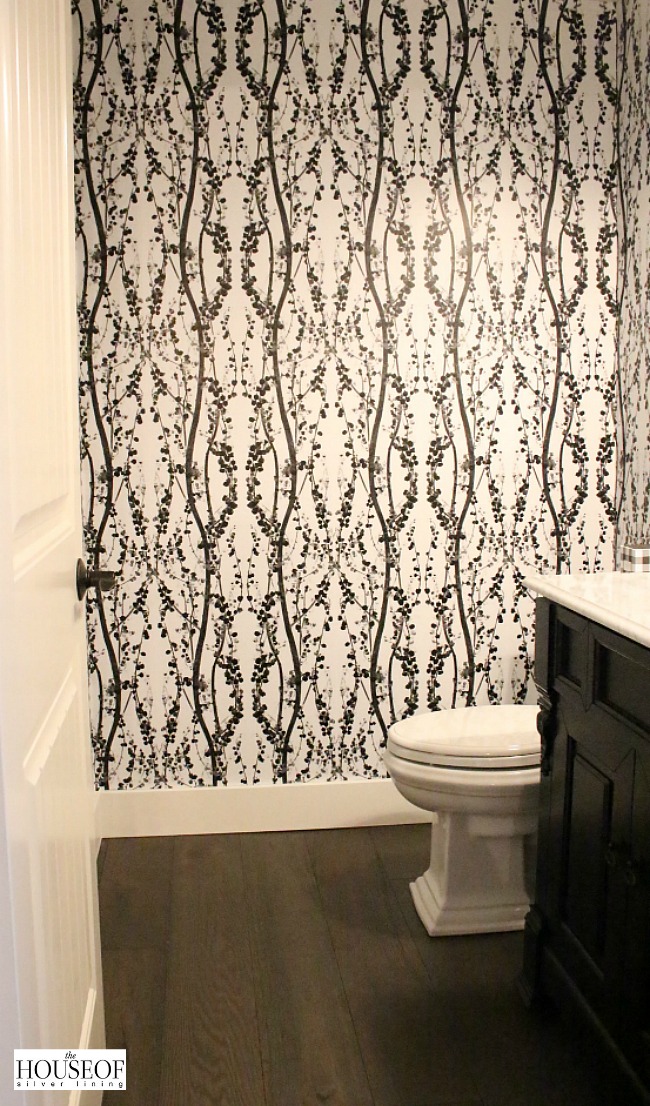
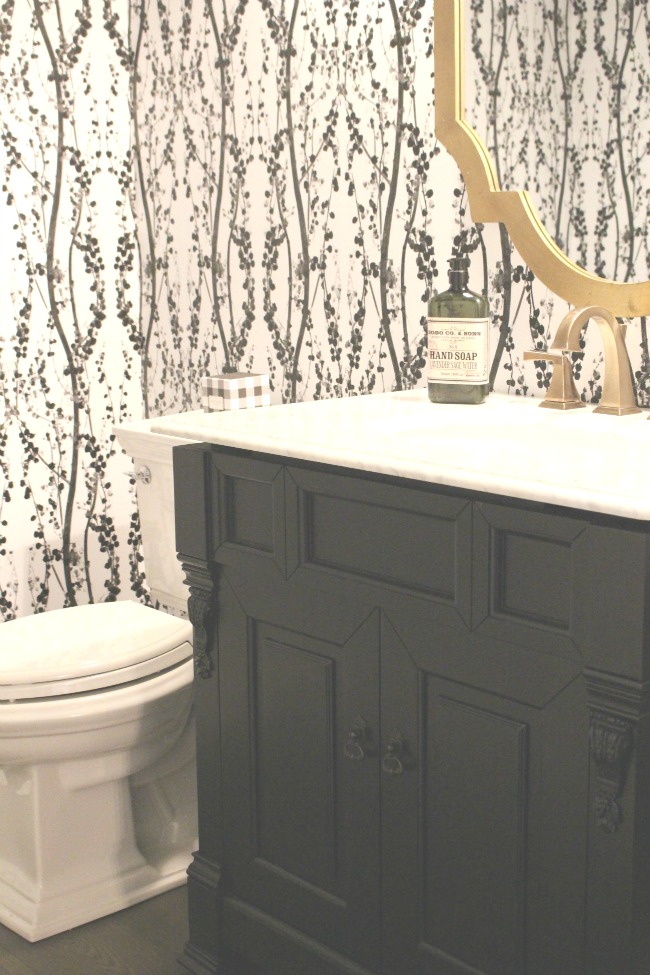
You can read about the beginning stages of this project here. When we added this new bathroom to our original unfinished basement space it felt so dark and dreary. My favorite paint color, Revere Pewter by Benjamin Moore, was on the walls, but it still needed some pizzazz! My new Tempaper wallpaper has completely brightened it up! They have so many great choices of paper, but I finally decided on Branches Black & White.
Tempaper Recommends:
- We always recommend 2 people for the job
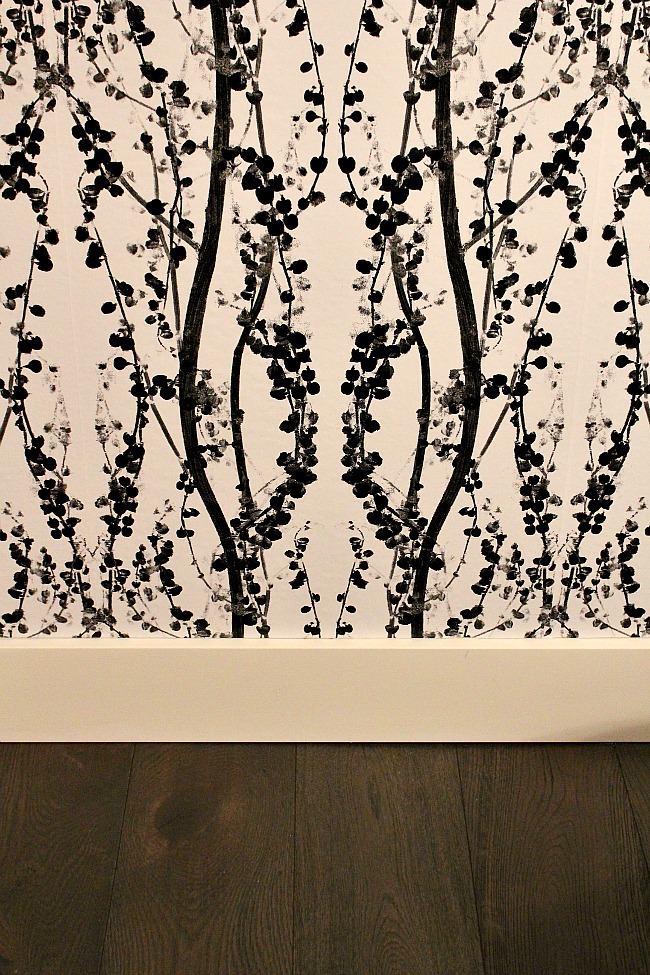
- Apply to a wall that has a satin/semi gloss painted surface. If you apply to a wall painted in a matte finish you can run the risk of Tempaper adhering to the wall and upon removal taking some of the paint off of the wall
- Stay away from textured walls (orange peel is the most texture we recommend you apply it too). Having texture on the wall will cause air to get behind the product and it will not adhere properly.
- Make sure you have all of your tools before you start (see recommended tools on customer service page)
- Give yourself time
- It is NOT recommended that it can be re-used
- We do recommend overlapping the paper just a bit from panel to panel to avoid splitting seams in environments that can be subjected to temperature variances.
After hanging this paper I have a few suggestions. First of all, Tempaper self adhesive wallpaper is a great product and can be very easy to install. However, if you’re hanging it in a bathroom where you have a lot of cut ins around toilet and vanity, two people will make your life easier! I did the job solo and have to say that it was a struggle working around those tight spots in my bathroom because the paper is so sticky and will firmly stick on to anything it touches. So you can imagine it sticking to my toilet when it was supposed to be on the wall…big sigh! So if I had an extra set of hands to help guide the paper behind the toilet, I don’t think there would have been an issue. Lesson learned for me!
I also have a light orange peel texture and proceeded to take my chances with the wallpaper adhering properly. I’m happy to announce that over a week later it looks great and is stuck on the walls! Make sure you use the tempaper squeegee! Air pockets will form under the paper and the squeegee will smooth those all out! Definitely don’t skimp on this step!
Seriously I can’t stop staring at my bathroom! It sits directly across from my office, perfect birds eye view. I still need to decorate the walls, but whatever it will be I’m thinking simple since the paper does the talking itself!
Vanity || Faucet || Hardwood Floors – Kingston Oak || Mirror- Hobby Lobby || Sconces


Oh I love, love, love it. If my walls weren’t so heavily textured I would add some in an instant. The perfect pattern and such a gorgeous bathroom.
Thank you so much Marty! Those textured walls can be a bugger! I wish I had the smooth texture in my Colorado home, but it’s the norm for orange peel texture. It’s doable but not my favorite. Thanks so much for stopping by the blog!
XOXO,
Shauna
I’m so smitten with this paper Shauna!!! It’s so lovely I may have to use this pattern at some point as well!! And you did a fabulous job on the whole space!!! Love the mirror, faucet and everything????
Thank you Bree!! I can’t believe this bathroom is just about done! Well, minus the TP holder is still missing! LOL!!
XO,
Shauna
Shauna- this is fantastic and brings such a sophisticated feel to your bathroom. Awesome work!
Thank you Kelley!! So sweet of you to stop by the blog!
XO,
Shauna
I am in love with this! The paper and that vanity are to die for! Of course the brass fixtures and mirror are the stunning jewelry – fantastic job! Tamara xo
Thank you Tamara! I LOVE my new Delta champagne bronze faucet too! Not too shiny, just perfect! Thank you so much for stopping by the blog sweet friend!
XOXO,
Shauna